
ABOUT
Tray Tables Up is a window into the world that we all share. It’s a written and photographic journal of people we meet and experiences we amass from our travels. Most of our waking moments are spent planning our next adventure. We live for these experiences and for the transformation that travel and food, Read More
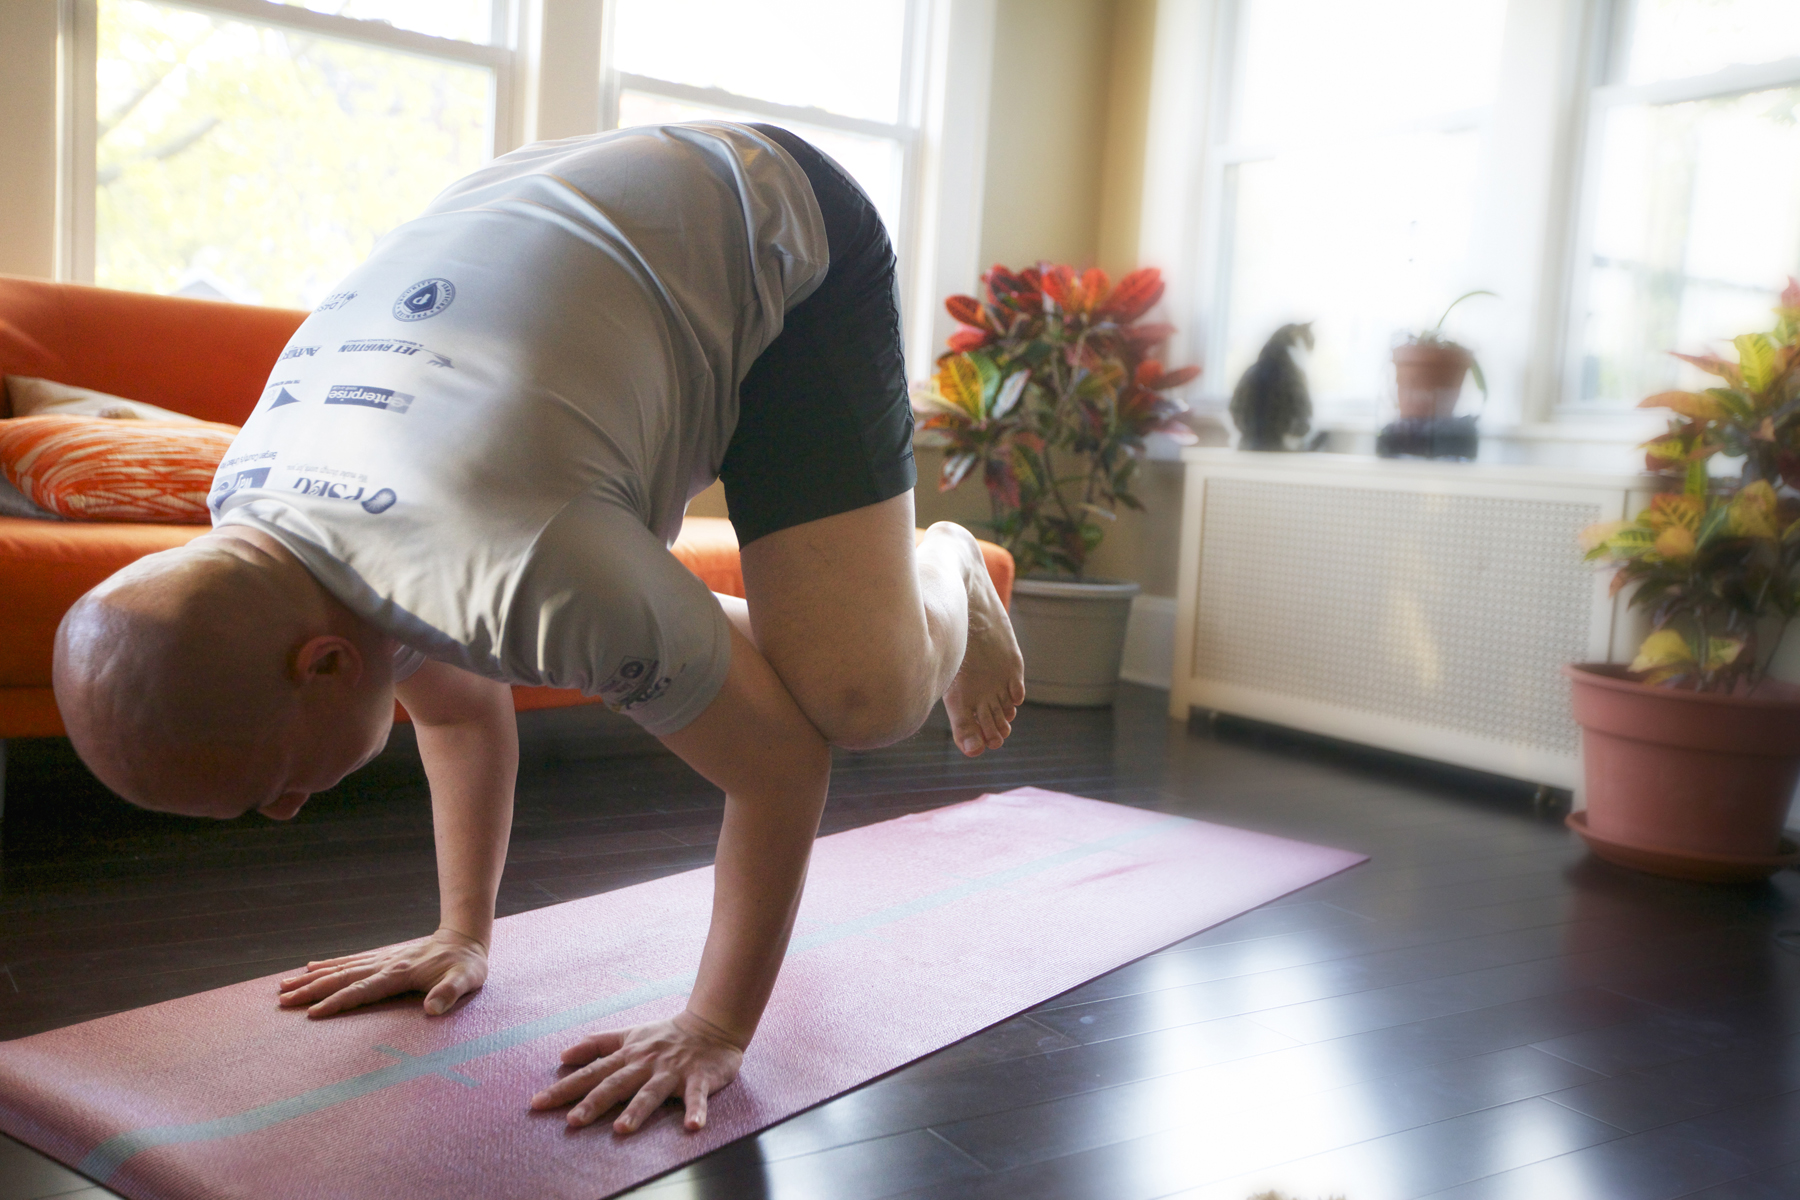
Diving into a forward bend, a pool of sweat slides off my head and disappears into my drenched Yogitoes towel. The 100 degree humidity-soaked air beckons a steady stream of perspiration from every pore on my body. Even though it’s a futile effort, I smother my face into a hand towel. A moment later, my sweat returns with a vengeance. I’m a leaky faucet that can only be fixed by a restful shavasana.
Lying quietly on my mat at the end of Jessica Sporn’s power hot yoga class at noon, I’m wrapping up with a 20 class in 30-day challenge at Powerflow Yoga’s Bloomfield, NJ studio. Exhausted, sweaty and absorbed in the experience, a smile – as it always does at this very moment – slithers onto my face. The person on this mat is a world away from the person I once was without it.

Merely six months ago, I was bogged down in a personal quagmire. While I’ve always considered myself to be relatively healthy, I drank a little too much, indulged in food and didn’t exercise nearly enough. I loved running outdoors, but New Jersey weather has a habit of presenting convenient excuses for not working out. My weight was steadily increasing and my sense of well-being slipping away with each pound I packed on.
Simply put, I was getting fat and feeling miserable.
My wife, a veteran hot yogi of more than 10 years, knew I had hit the bottom of my own personal health abyss and recommended I join her hot yoga class – a request she’s made consistently for more than five years. In October of 2012, I relented and decided to give it a shot… not because of her persistence, but because I finally wanted change and was willing to make it happen.
My first hot yoga class at Garden State Yoga was not love at first sight! Men and women in tight, sometimes barely-there, clothing from a company that sounded more like a Caribbean rum cocktail than athletic wear (Lululemon!); extremely limber people that could effortlessly contort into pretzel-like shapes called asanas; people who could seemingly levitate their legs above into magnificent inversions. I struggled to fold, bend, reach, stay, twist, keep my panting mouth closed AND breathe in an insanely hot and humid environment. To someone with the flexibility of petrified wood, I found the experience daunting, foreign and both physically and emotionally challenging. I actually hated it. Yet, I persisted.
Sometime not far into my yoga journey – perhaps by the third or fourth week of hot yoga practice – the unexpected started to happen.
I was sleeping soundly.
I felt sustained energy throughout the day.
I willingly turned down drinks at business and social events because I didn’t want to waste the effort I put into my yoga practice.
I began craving the time on my mat. Not just for the physical and aerobic benefit, but for the experience of resetting myself and clearing my mind. It was like the ultimate all-around catharsis.
I became stronger and more flexible. All of the sudden, my toes didn’t feel like they resided in a different time-zone.
I felt… happy.
Sixth months to the day that I started hot yoga, I’ve dropped nearly 30 lbs. As content as I am with the weight loss, it’s the immeasurable benefit that is truly the transformative aspect of this journey. I am stronger, limber, calmer, energetic, arguably smarter and more resolute in my ability to manage my health and overall well-being.
My time on the mat has taught me that health isn’t the end-result of extreme dieting, hours-on-end at a gym or absolute avoidance of indulgences. Instead, it’s about balance. I still have a drink when occasion warrants and eat the types of foods that I love. The difference now is that these decisions are moderated and aligned with a healthier lifestyle foundation that I’ve established through yoga.
I’m ecstatic to be on this journey and to be able to share it with my wife. I also look forward to seeing where it brings me. Until then, I feel blessed for the positive transformation that has radiated through my life from just being able to practice. And… that is why at the end of every class, despite the inevitable sweat tsunami and the challenge, you’ll always catch me with that smile on my face.
___________________________
Hot yoga vitals:
If you live in the northern New Jersey area, I invite you to check out Garden State Yoga in either Bloomfield or Glen Rock, NJ. A great studio with amazing instructors and fellow yogis.
Web: www.powerflow-yoga.com
Facebook: www.facebook.com/PFYBloomfield/
My favorite yoga gear:
Yogitoes rSkidless BIG Yoga Towel (Oversized so that it wraps under the front and back of a standard sized mat. Super non-slip for great grip!)
Jade Harmony Professional 3/16″ Yoga Mat (Soft, thick and super high quality.)

Cerro Chato’s crater viewed from the sky. Photo Credit: http://www.arenalvolcano.com
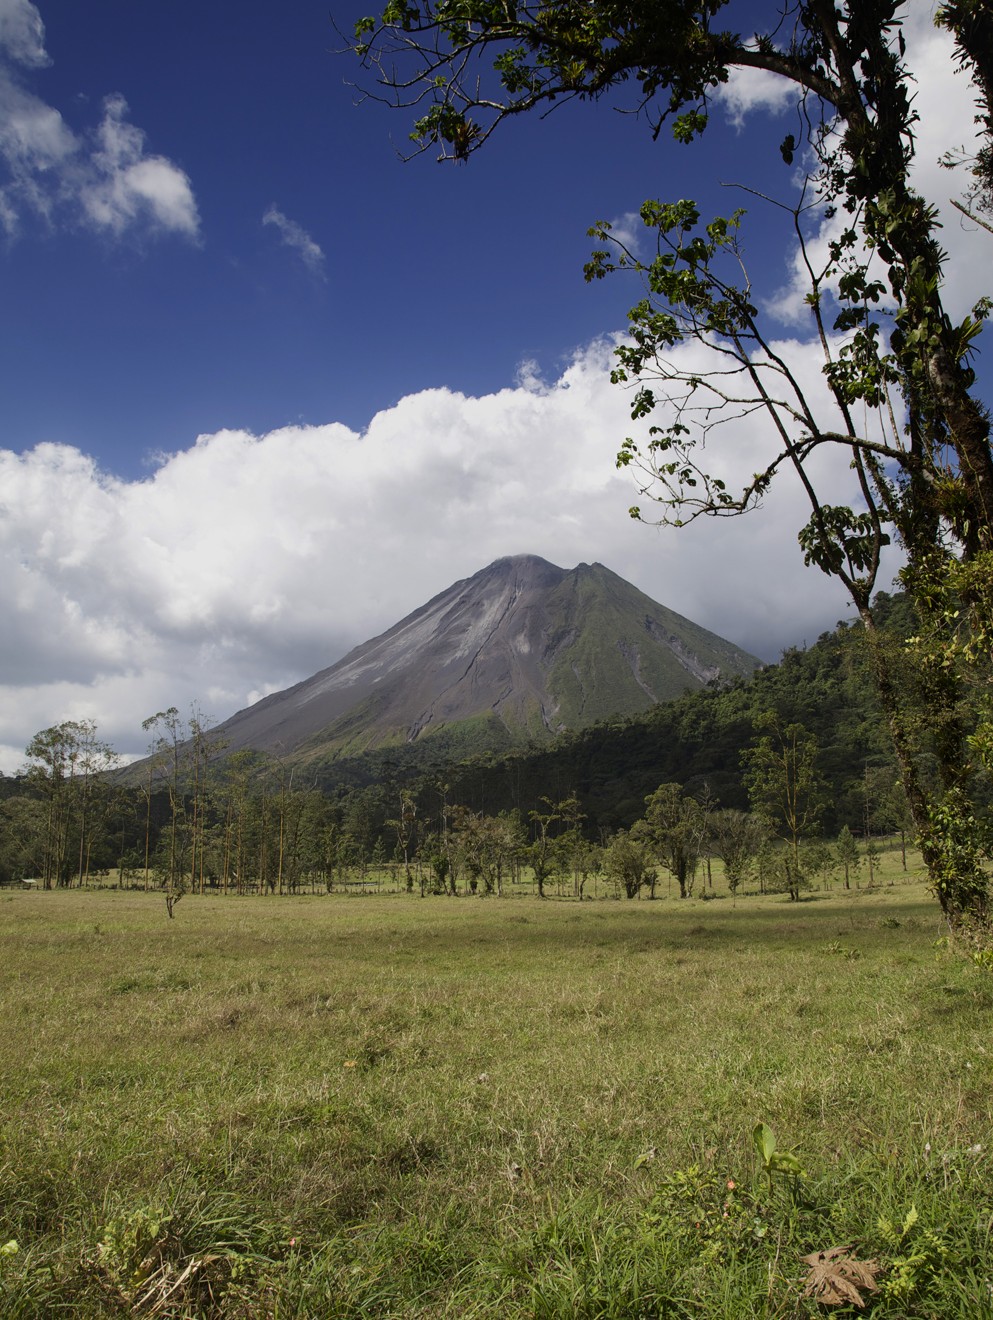
Cerro Chato, a dormant volcano in northern Costa Rica, last erupted 3,500 years ago. It is located in the shadow of the Arenal Volcano, which was the country’s most active volcano until 2010.
Cerro Chato is now a primary rainforest teaming with wildlife. Those willing to tackle a rigorous two-hour trip to the top will be rewarded with a secluded green lagoon nestled in the volcano’s crater and a hike where you’ll encounter few people.
This is a physically demanding hike that can be treacherous and often quite muddy. The leg descending the volcano’s crater into the green lagoon has some near vertical sections where getting down on all fours is the best mode of transport. You’ll find yourself occasionally with hands clenched to tree roots, legs dangling as you slowly lower yourself down the trail. If you’re a novice hiker looking for a leisurely half-day stroll, a hike to La Fortuna Waterfall or the Hanging Bridges would better fit the bill.
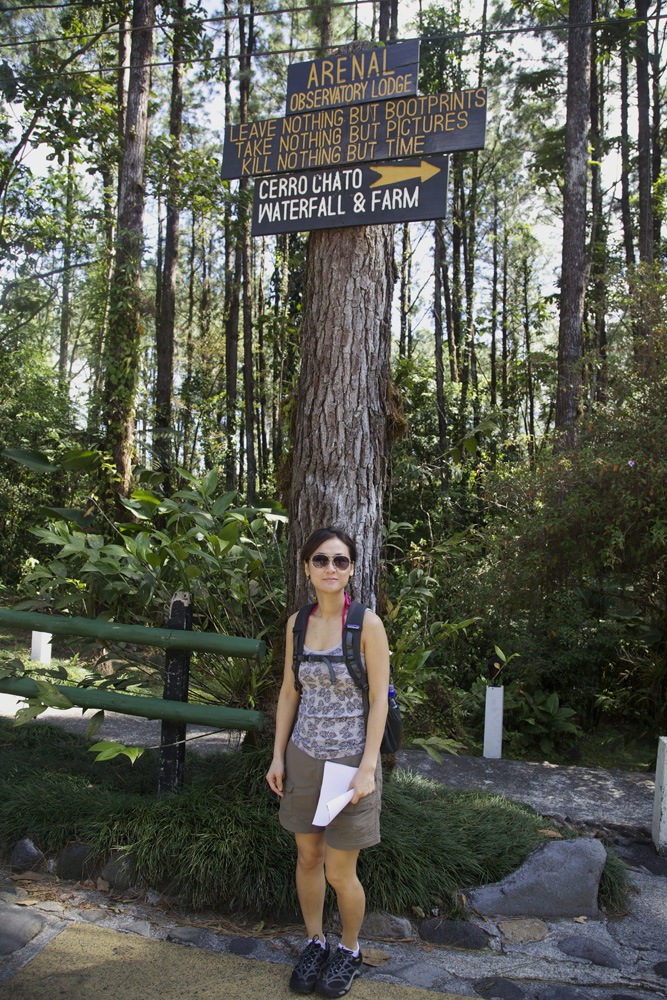
Signs to Cerro Chato at the
Arenal Observatory Lodge
It is also recommended that you don’t begin this hike after noon. Average hikers will need a full two hours to climb up, perhaps an hour taking in the lagoon experience, and another two hours making your way back.
To access the trail-head, go to the Arenal Observatory Lodge (directions). The charge to enter the lodge is $8 USD per person. If you’re driving, the guard will direct you further up the main road to parking near the reception area. The lodge itself boasts amazing close-up views of Arenal Volcano. Once parked, follow the signs (which are readily visible around the lodge parking area) to Cerro Chato.
The first thirty minutes unfold over gravel roads that roll past picturesque farmland and unique trees. Magnificent views of the Arenal Volcano are available only at this point during the hike, so take your photos here.
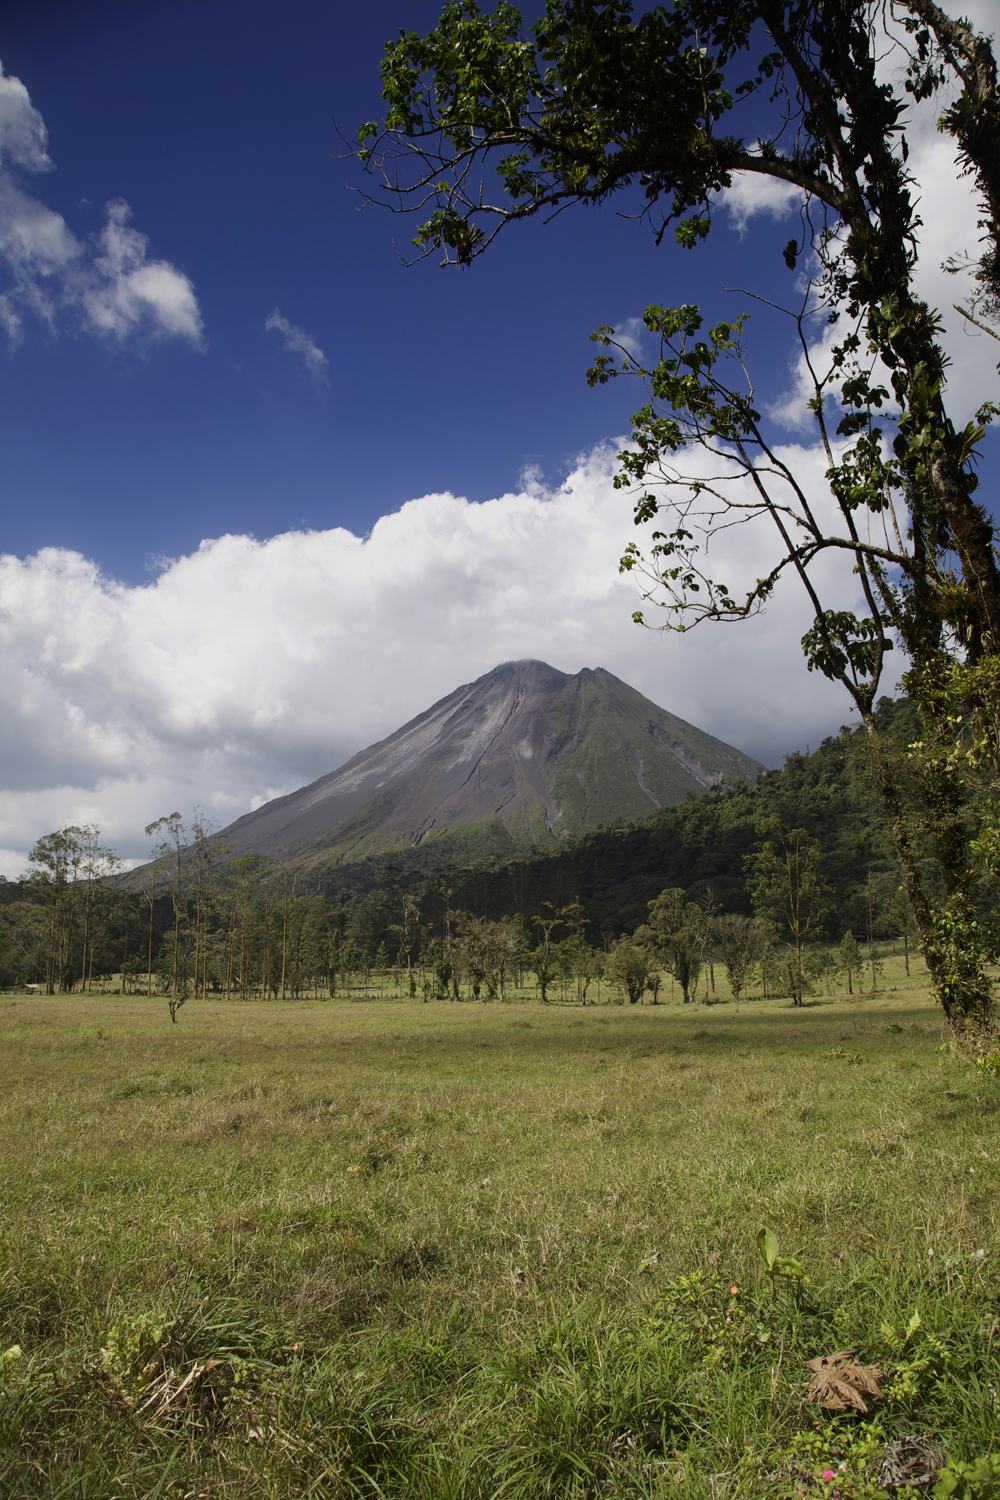
Views of Arenal Volcano along the way to Cerro Chato.
You will eventually approach a sign with an arrow pointing left of the rainforest canopy. (See photo below.) It might not be immediately apparent, but follow the trail directly into the rainforest canopy. You’ll see additional signs for Cerro Chato once in the canopy. This is where the fun begins!
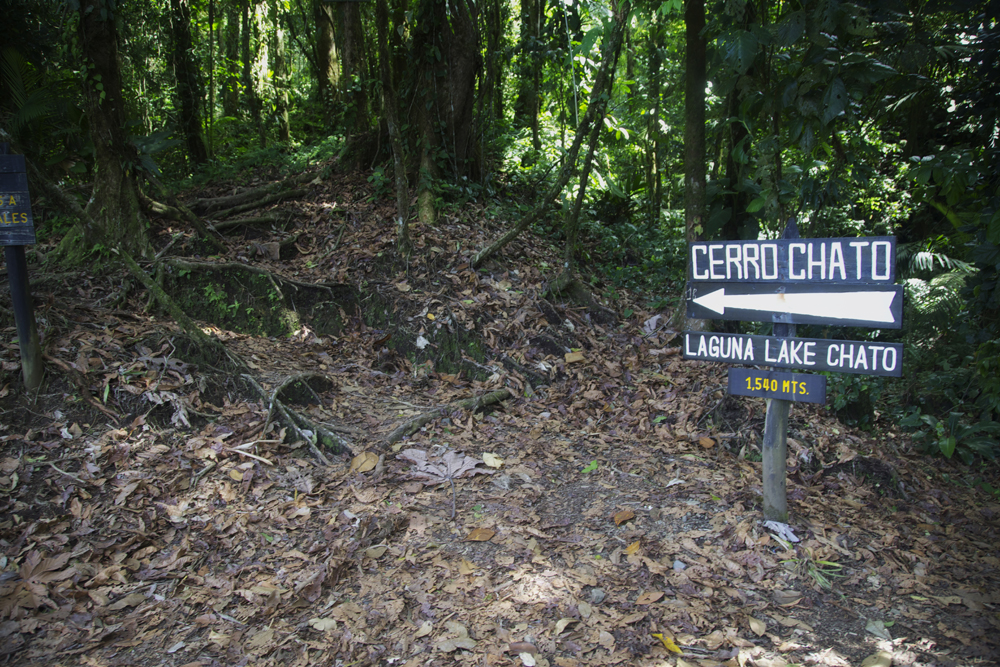
Trail starts into the rainforest canopy
The trail will lead you through dense rainforest. After another hour, you’ll reach the summit of Cerro Chato where the green lagoon makes its first appearance directly below. This is a great spot to take a quick break, sit on a tree root and and reload with a power bar since the green lagoon itself doesn’t have any place to sit.
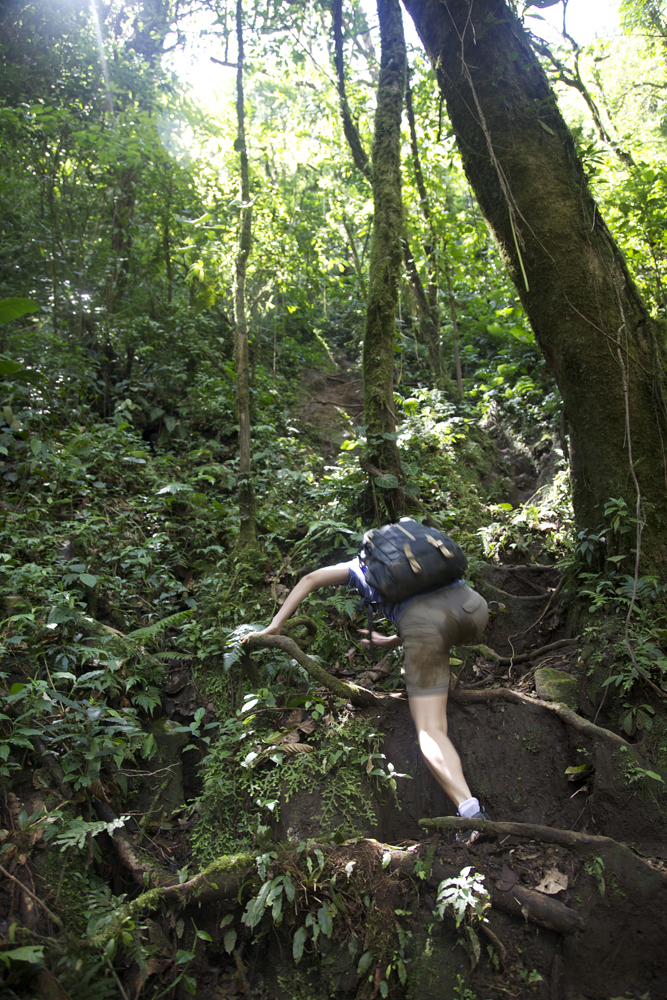
Descending the crater toward the lagoon.
The last leg of your hike, scaling down the crater to the green lagoon, is the most difficult part of the trip. Although average hikers will be able to do this in 20-30 minutes, take your time to ensure secure footing and safely progress down the remainder of the trail. Fortunately, scaling back up the crater is much easier.
Once you’ve reached the lagoon, take a dip in the emerald green water and revel in your accomplishment! The water is generally pretty cold, but it’s perfect after a strenuous two-hour hike and for washing off your muddy legs. If you stay still while in the lagoon, you’ll feel little fish crowd around your feet to nibble at your skin… a very surreal experience and not the best scenario for those who are very ticklish!
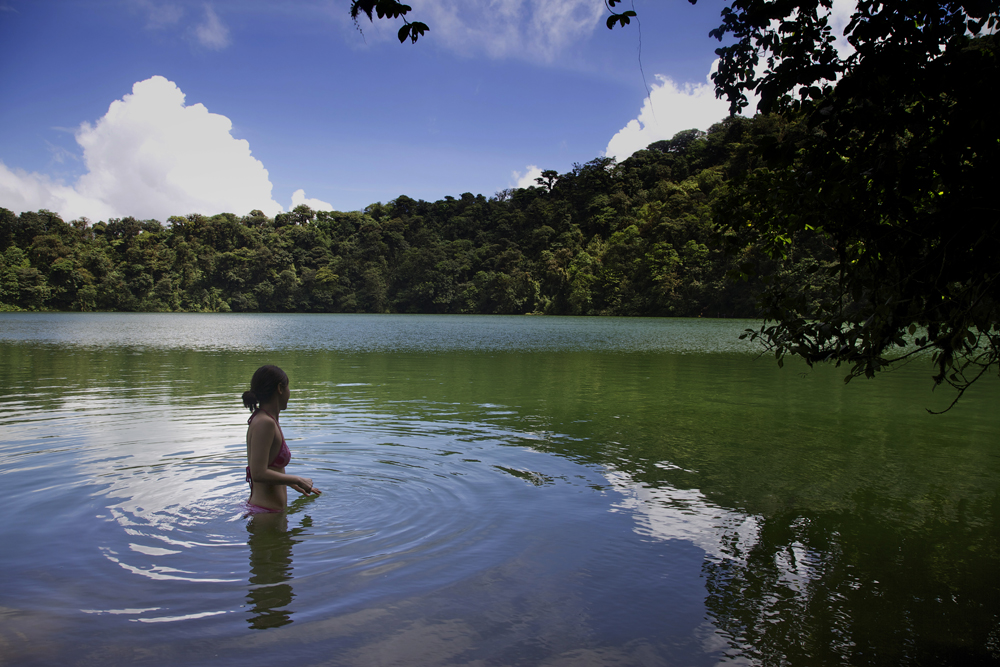
Joyce taking a dip in the emerald green lagoon of Cerro Chato’s crater
After completing your hike, grab a cold beer at the lodge for the perfect ending to your hike.
Hike Vitals:
Cerro Chato (Dormant Volcano)
Height: 3,740 ft (1,140m)
Hike Time: Approximately 4 hrs round trip
Hike Length: Approximately 6km round trip
Trail-head Access: Arenal Observatory Lodge (directions)
Cost: $8

We carefully inch our way through the chaos at the intersection of Midland Avenue and Hylan Boulevard. Cars on the opposite side do the same. The traffic lights dangle overhead without power, unable to keep order. Further down the debris-lined street, the scene repeats intersection after intersection as we approach Midland Beach.
I spent the first ten years of my life in Staten Island. Returning to these streets, after Hurricane Sandy, brought back a flurry of memories from my youth. The neighborhoods are obviously not quite as I remember. Soaked and contaminated debris, furniture and rubble line the streets as hazmat-geared workers rummage through still-flooded buildings. Sand, mud and water puddles defiantly remain as a testament to 20-foot tidal surges that slammed the island.
People are out and about, many gathering and distributing supplies while others are wandering around, aimlessly with bewilderment and an almost post-apocalyptic zombie-like gaze on their faces.
Watching news footage of Staten Island’s devastation left my wife, Joyce, and I with a sense of nagging guilt. While we weathered the storm with minor damage and sporadic loss of electricity, the comfort of heat and hot water in our home was a far cry from conditions Staten Island residents were experiencing a mere twenty miles away. We needed to do something to help.
With temperatures dipping below freezing at night, we formulated a plan to gather supplies, drive to Staten Island and get them directly into the hands of residents in immediate need. Faced with a gas shortage and a 1970’s OPEC crisis-styled gas rationing in NJ that led to lines often exceeding a mile, we took the safe bet and drove out to unaffected Bangor, PA to top off our tank and several back-up gas cans.
Within two hours of making the announcement of our supply drive on Facebook, our front porch was littered with donations. We had friends that purchased baby formula, diapers, water and batteries, all the while sacrificing their own limited gas stock to brave stores with limited supplies. Neighbors donated warm coats, clothing, towels, blankets, canned food, cookies, crackers, juice, children’s clothing, backpacks and teddy bears. Our friend Rachel drove over thirty miles to supplement our supplies and volunteer her time with us in Staten Island. When all was said and done, we had enough supplies to completely fill every nook and cranny of our car.
Greeted by a swarm of city officials, volunteers and local citizens at Midland Beach, one of New York City’s Office of Emergency Management’s staging points for relief efforts in Staten Island, we scrambled to load supplies onto an MTA bus for distribution directly to the area’s citizens.
Here are photos of our experience:
 Work crews removing contaminated furniture from buildings along Midland Avenue, Staten Island. |
 Debris lining streets in Staten Island. |
 Burned down storefront on Midland Avenue, Staten Island
|
 New York City’s Mobile Emergency Management trailer for Midland Beach, Staten Island |
 Joyce passing on supplies to a volunteer. |
 Supplies getting sorted in Midland Beach, Staten Island |
 Storm debris in Midland Beach, Staten Island. |
 Local residents supplying free food, drinks and water. |
Four weeks after Hurricane Sandy, most of us in the New York metro area have returned to normalcy – the daily work grind, prepping for the holidays and life as we knew it prior to the storm. Residents of Staten Island, the Jersey Shore and other affected areas of Sandy sadly don’t have this same privilege. As I sit down tonight for Thanksgiving dinner, my thoughts go out to the people of Staten Island. I am also touched to be surrounded by people who have given, sacrificed and donated in difficult times to help others in dire circumstances. For this, I am extremely thankful.
_______________
Staten Island still needs our help. If you’re interested in volunteering, please visit: http://occupysandystatenisland.tumblr.com/

 When I was 19 years old, I took a flight on (the now extinct) Northwest Airlines. As a travel newbie, I loosely packed my belongings into the safe-haven of my huge family-sized suitcase. My camera, clothes and several albums of personal photos (these were pre-digital days) were all stowed away in the checked-in luggage. Upon completion of the return leg of my trip from Tokyo back to Hong Kong, I stood waiting at the baggage carousel.
My luggage never showed up.
I lost my camera and other belongings – but more painfully, I lost photos that could never be replaced.
Painful lessons learned, I now try to avoid checking in baggage for fear of losing personal items and also to avoid ever-increasing luggage fees charged by airlines. On top of that, the wait at the luggage pickup can be downright frustrating.
Stowing all of your belongings in a carry-on for a two week vacation isn’t nearly as easy as it sounds. Combined with the strict weight limitations many foreign carriers impose, advanced planning is certainly needed. Here are some tips I have learned from years of domestic and international flights for light and efficient packing.
1) Bring washable and quick drying garments
Washing your undergarments and other light clothes can save you a couple of pounds in the luggage. If your itinerary includes staying at a hotel for a night or more, that’s the perfect opportunity to wash dirty garments and set them aside for drying. Just make sure to bring a small two or three ounce bottle of Woolite and you’ll be all set.
There are a ton of travel clothing options that are designed for quick drying and are perfect for in-travel washing. Our favorites are the following:
- Travel socks
- Men’s travel underwear
- Women’s travel underwear
- Men’s travel shirt
- Women’s travel shirt
2) Bring throw-away items
You know that T-shirt that has been washed to the point when it changed from black to pale gray? That pair of socks that’s seen better days? Bringing along throw-away clothes for a final wear gives your long-lived garments a magnificent send off. Plan your clothing allotment so that once you’ve worn these clothes once or twice, you can discard them. Your load will lighten as you progress through your trip and you might even have some extra room for souvenirs!
3) Bring only essential toiletries
Most hotels will provide at least basic shampoo and soap. Bring only what you really need. I can’t live without hair conditioner, so I carry a three ounce bottle to get me through the trip. An important point for ladies – are serums absolutely necessary? Can you use your facial moisturizer as eye lotion? Most of the time, less is really more on the road. One of my favorite brands is Paula Begoun. Their moisturizers can serve multiple roles: http://www.paulaschoice.com/category/moisturizers
Save those packets of samples that you get when you buy make-up/skincare items so you can use them on trips.
I also love Olay facial cleansing sheets. I find using one whole piece is a bit too much, so I cut these sheets in half. And the best thing is that this contributes to rule number 2 – you get to throw stuff away as you use them.
4) Create an itinerary for your wardrobe.
It’s natural to bring more clothes than you actually need for a trip. Make sure your clothing selection is versatile. Bring basic clothes in neutral tones so that pants/shorts/skirt combinations will match. And ladies, if you’re like me, you don’t always want to look utilitarian on your vacations. Climate permitting, I’ve gotten into the habit of bringing a large colorful scarf to brighten up my outfits. Not only does a scarf add colorful accents, it also serves as small blanket on flights or train rides and an extra layer of warmth if needed.
Shoes can add a huge amount of weight to luggage. They also take up a ton of luggage space. There are endless selections of stylish shoes that are durable, light-weight and fashionable. Flats are more comfortable to walk in and tend to weigh much less than a pair of heels. For men, one of my favorite brands light-weight shoes is Campers. They have stylish and comfortable shoes that are nearly weightless, yet super durable.
5) Zip a Dee Doo Dah! Roll with it!
The traditional packing technique involves folding your clothes and stacking them into your luggage. This turns out to be an inefficient packing strategy. Instead, roll your clothes tightly and pack them like sardines in Zip-Lock bags. Rolled clothes save space and prevent wrinkles. Plus, squeezing out the air in the Zip-Lock bags helps to save even more space and prevents clothes that might be slated for wear later from being ruffled early in the trip.
There you have it! With a little more planning and foresight, you can avoid losing luggage, unnecessary check-in fees and hassle!